Introduction
This is a walk-through guide for getting started with the Secomea solution. After this tutorial, you will know how to connect your equipment easily for secure remote access.
Let's Get Started
Before starting, you need to know some basic information about the Secomea solution.
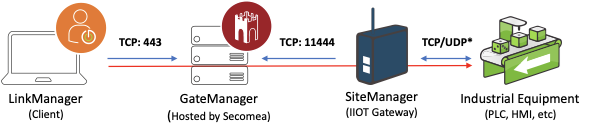
LinkManager: Is the software/client used to gain remote access to the industrial equipment connected to your SiteManager.
GateManager: Is the central server that creates the encrypted connection between LinkManager and SiteManager.
SiteManager: A hardware IIOT Gateway (or embedded software) typically installed with a PLC/HMI or other industrial equipment to enable remote access.
Agents: Are the devices such as PLC's and HMI's that are connected to the SiteManager.
GateManager - First-time login
Overview:
The purpose of this article is to guide you through logging into Prime.
To achieve this, you can either:
1. Utilize your administrator certificate & password for your GateManager account
2. Enter your e-mail (username) & password
3. Login via. SSO (This requires a Professional/Premium package)
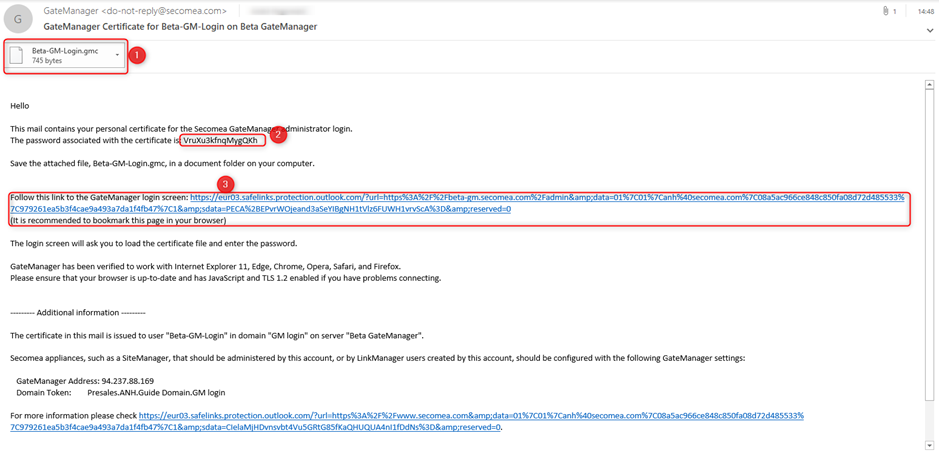
For the first method, utilize the certificate you received when your GateManager account was created & your updated password, since account creation, as highlighted in the screenshot below.
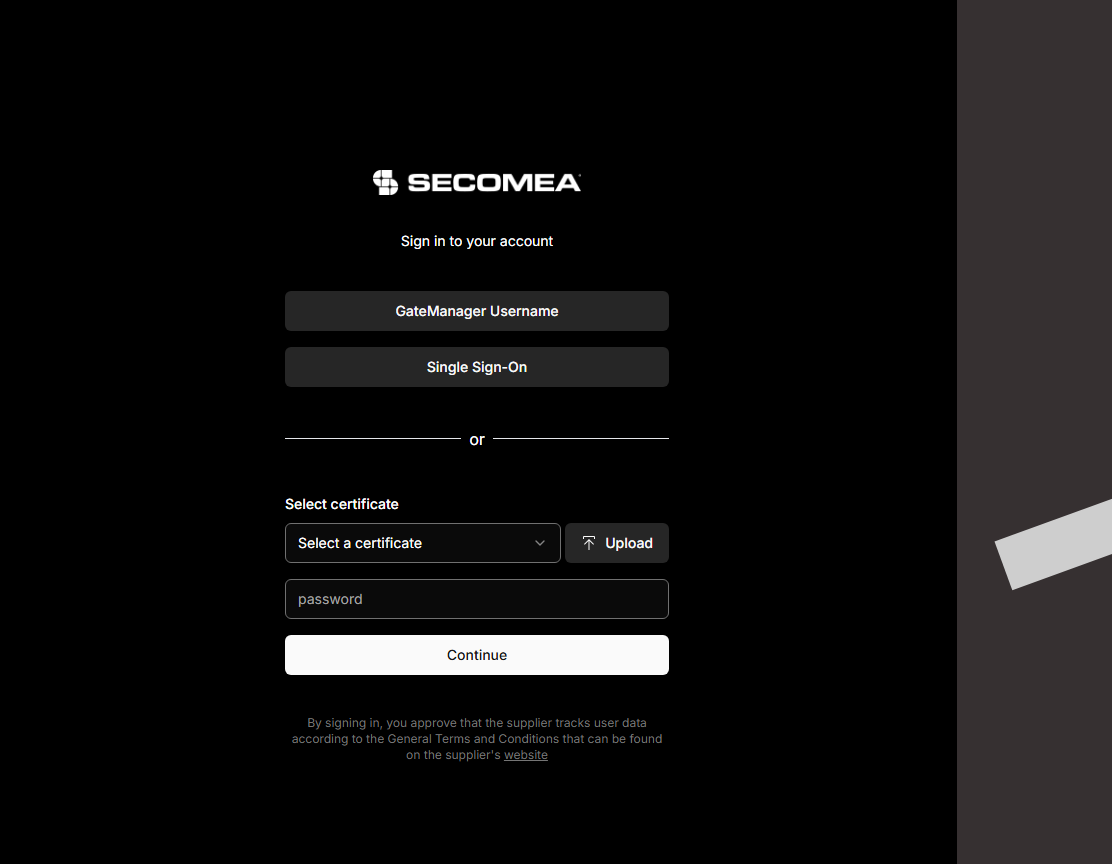
Login page
In order to log into Prime, navigate to this URL: https://app.secomea.com/
Here, you will be presented with the three above-mentioned options for login & the option to upload the certificate from your local machine.
Once logged in, you will be presented with an overview and the Secomea Prime Dashboard screen.
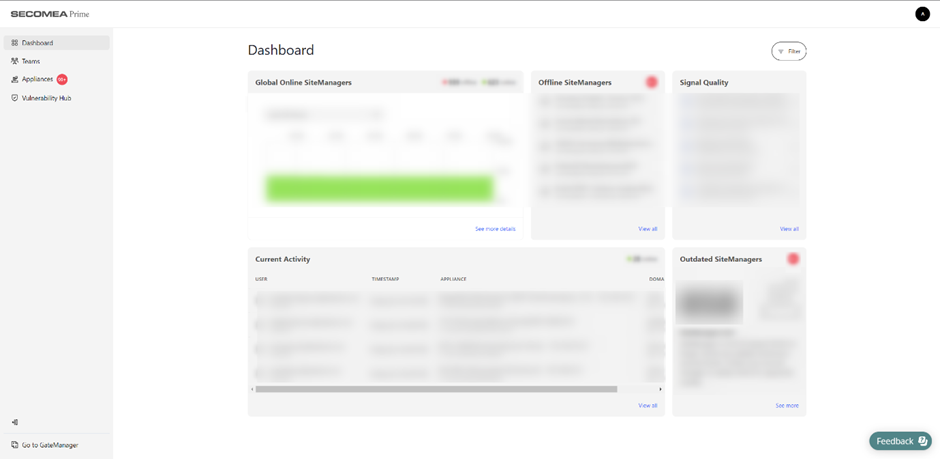
To enter the GateManager for SiteManager configuration and connecting purposes, please press the "Go To GateManager" button at the bottom left corner.
Configuring a SiteManager
There are multiple methods of connecting a SiteManager to your GateManager; you can choose a method that suits you best below:
For connecting the SiteManager using a USB stick: https://kb.secomea.com/docs/configure-a-sitemanager-with-an-usb-stick
For connecting the SiteManager using an Ethernet cable: https://kb.secomea.com/docs/configure-a-sitemanager-from-the-dev-port
For connecting the SiteManager using the Appliance Launcher: https://kb.secomea.com/docs/configure-a-sitemanager-with-the-appliance-launcher
Setting up a SiteManager Agent
After configuring the SiteManager and ensuring that it is online, you can add your desired agents (Endpoint devices):
The SiteManager supports a wide variety of devices per default; agents that are not available in the "Device List" can be added manually (assuming the required TCP and UDP ports are known)
To add agents, please follow this guide: https://kb.secomea.com/docs/sitemanager-agent-setup