The purpose of this article is to guide you through a Proof of Concept setup.
This setup is meant to be an easy way of getting, at first, simulated data to Azure IoT hub and then later you can add setup for your own devices eg PLC's, HMI's etc. for data collection from those.
Prerequisites
- Knowledge of SiteManager configuration. See SiteManager getting started guides.
- An Azure IoT Hub account Start a free trial here
- A SiteManager with release 9.0 or higher
See more info here.
Goto SiteManager GUI and create an agent with DCM enabled.
(Choose a Generic / Data Collector Module device)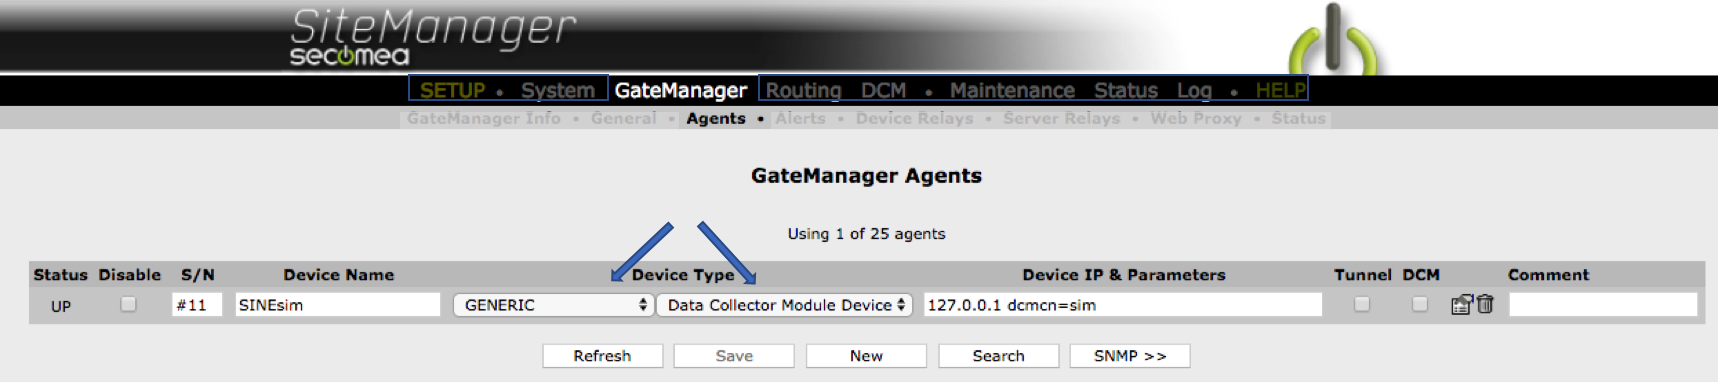
Click the parameter details icon
Add a DCM collector name (dcmcn) for associating the Agent and the DCM collector config.
(Remember the name for later use)
Click save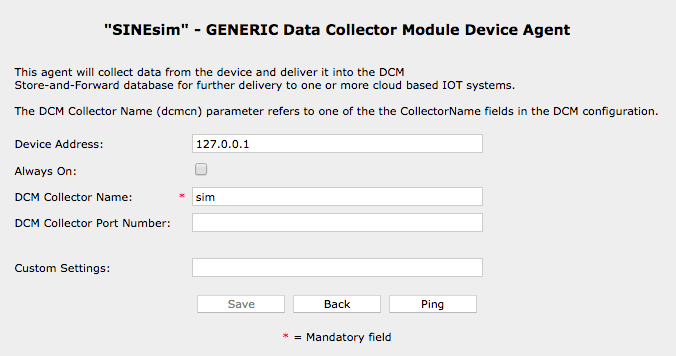
Goto DCM > edit and copy/paste the below configuration file into the editor.
{
    "ConfigName" : "AzureTest",
    "ConfigDescription" : "Azure Iot Hub test configuration",
    "Collectors" : [
        {
            "CollectorName" : "sim",
            "CollectorDescription" : "DCM Internal Simulation Server",
            "Protocol"   : "Simulator",
            "SamplePoints" : [
                {
                    "SampleName" : "sine",
                    "SampleDescription" : "DCM simulation of sine curve",
                    "SamplesSaved" : 3,
                    "SampleDataType" : "double",
                    "SimulatorData" : {
                        "SimulatorFunction" : "sine",
                        "SimulatorInitValue" : 1000,
                        "SimulatorIncValue" : 100,
                        "SimulatorSampleInterval" : 1
                    }
                }
            ]
        }
    ],
    "DataServers" : [
        {
            "DatasrvName" : "azure",
            "DatasrvProtocol" : "AZURE\/IOTHUB",
            "ConnectRetryMin" : 2,
            "ConnectRetryMax" : 240,
            "AZUREIotHubParams" : {
                "PublishInterval" : 6,
                "ConnectName" : "azurecs",
                "PayloadFormat": "{ \"v\" : [ %jb ] }",
                "BulkElementFormat": "{ \"ts\" : %t, \"%jd:%js\" : %jv }"
            }
        }
    ]
}
Goto DCM > Status >details and copy the device "Edge ID" value.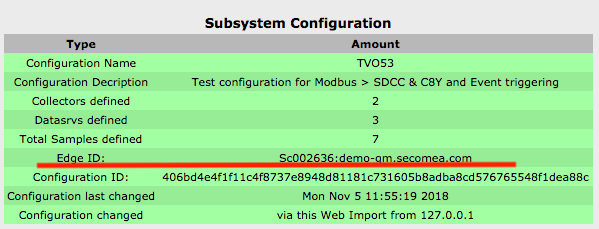
Log in to your Azure account and go to Iot Hub->
Go to Iot Devices->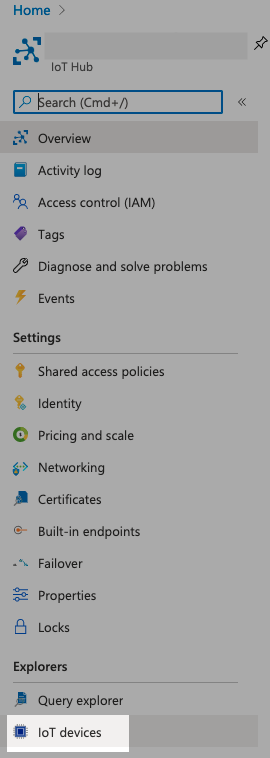
Press the [New] button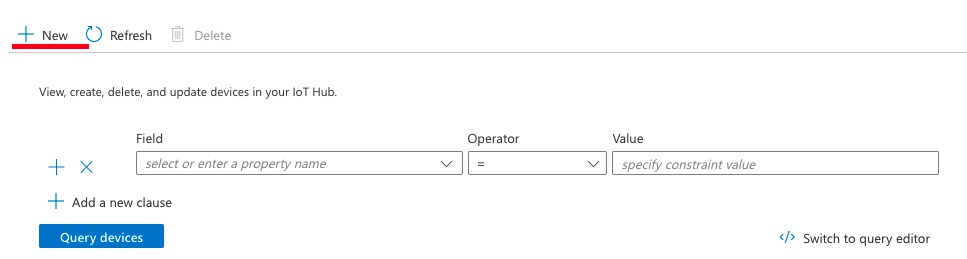
Fill in the device Edge ID, select Authentication Type "Symetric Key" and press [Save]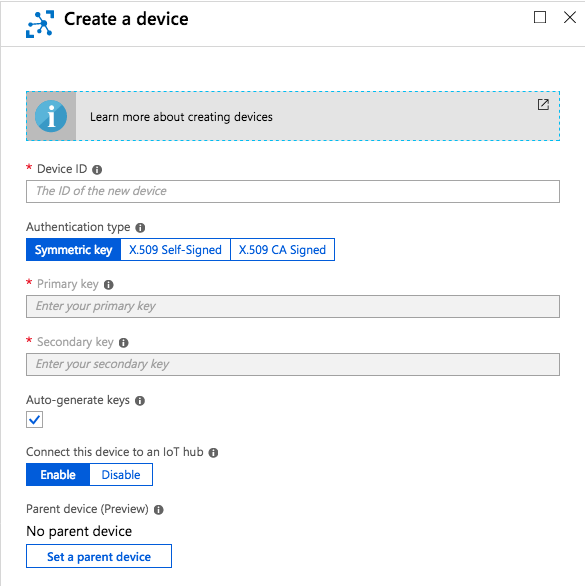
Click on the device Edge ID in your list of IoT Devices to view the Certificates and Keys.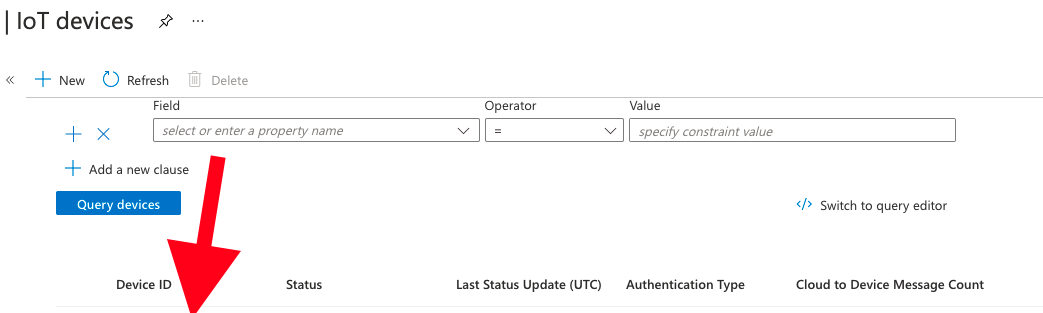
Now copy the "Connection String -- Primary Key" into your clipboard.
Log into the SiteManager GUI and go into DCM->Certificates and press [New]. Select type "Azure Connection String", give it a name (fx. azurecs) click the document icon (next to save)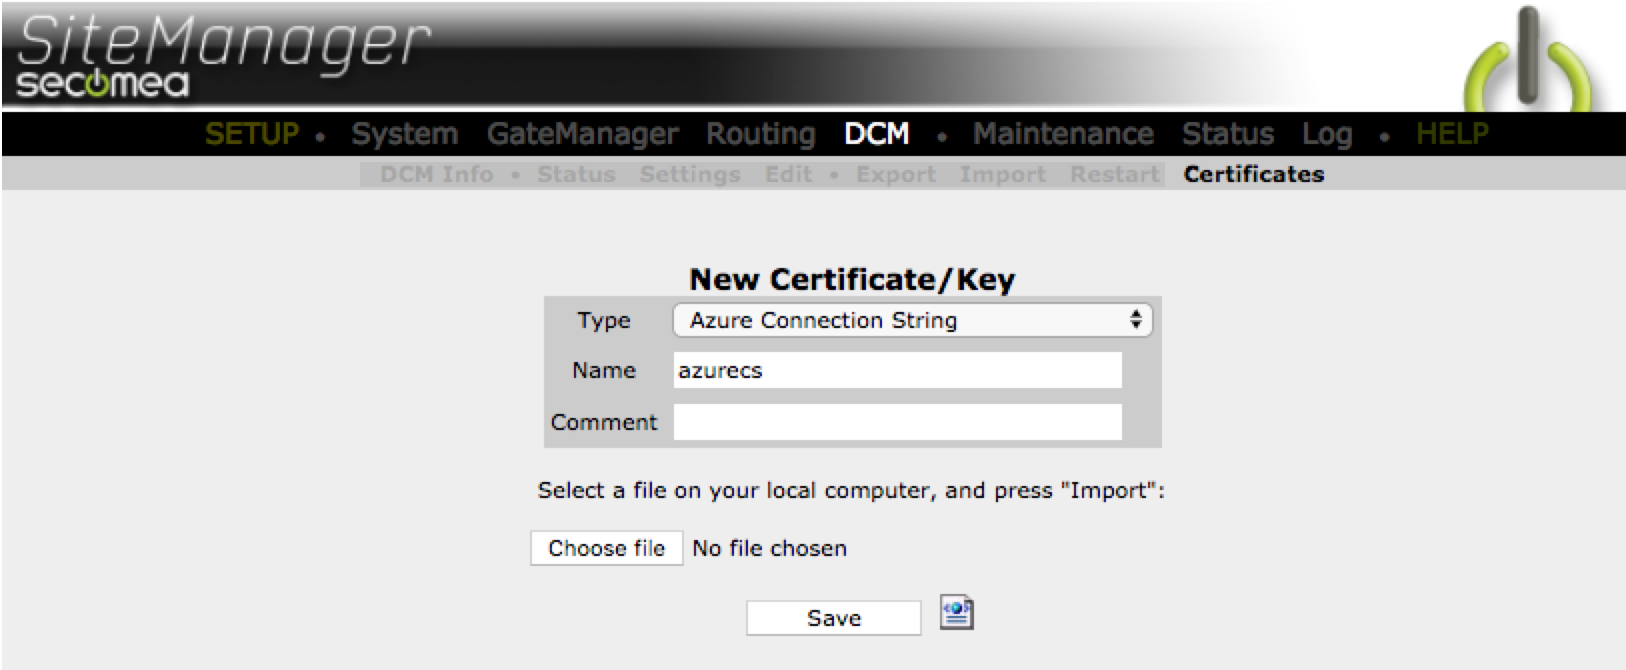
Paste the connection string from the clipboard. Click [Save].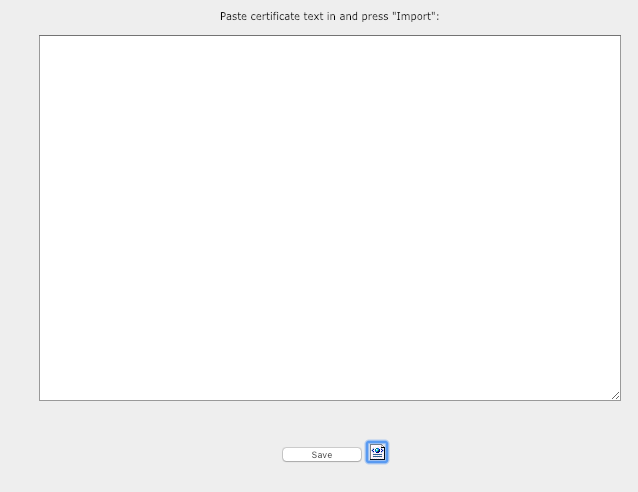
Go to SiteManager GUI DCM->Edit and copy/paste this configuration, where the "ConnectName" field value is the name of the connection string value you created in the previous step (eg. azurecs).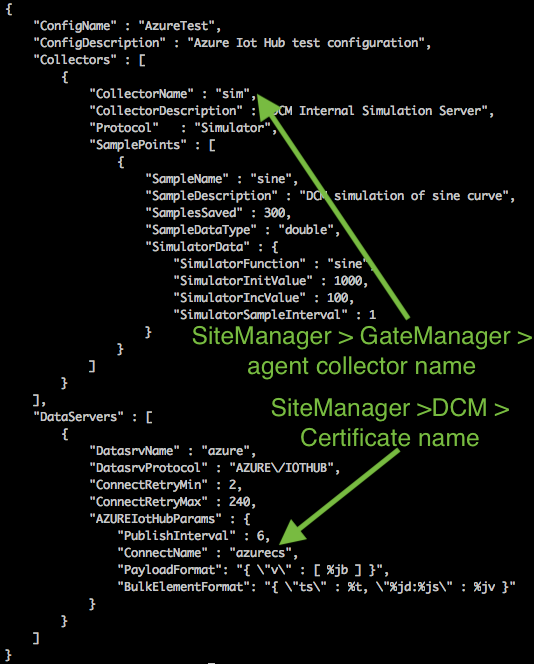
Goto DCM > Restart and restart the DCM incl the Store'n'forward DB.
Goto DCM > Status and check that the dataserver is connected and sending data to the cloud.
Next
Now it's time to learn more about the DCM config file and how to set it up for your devices:
JSON config file basic structure