The purpose of this article is to guide you through a Proof of Concept setup.
This setup is meant to be an easy way of getting, at first, simulated data to Amazon IoT core (AWS) and then later you can add setup for your own devices eg PLC's, HMI's etc. for data collection from those.
Prerequisites:
- Knowledge of SiteManager configuration. See SiteManager getting started guides.
- An Amazon IOT cloud (IoT Core) account.
- A SiteManager with release 9.0 or higher
See more info here.
AWS setup
Log in to your AWS account and go to "IoT Core"
Click on "Secure" and select "Policies"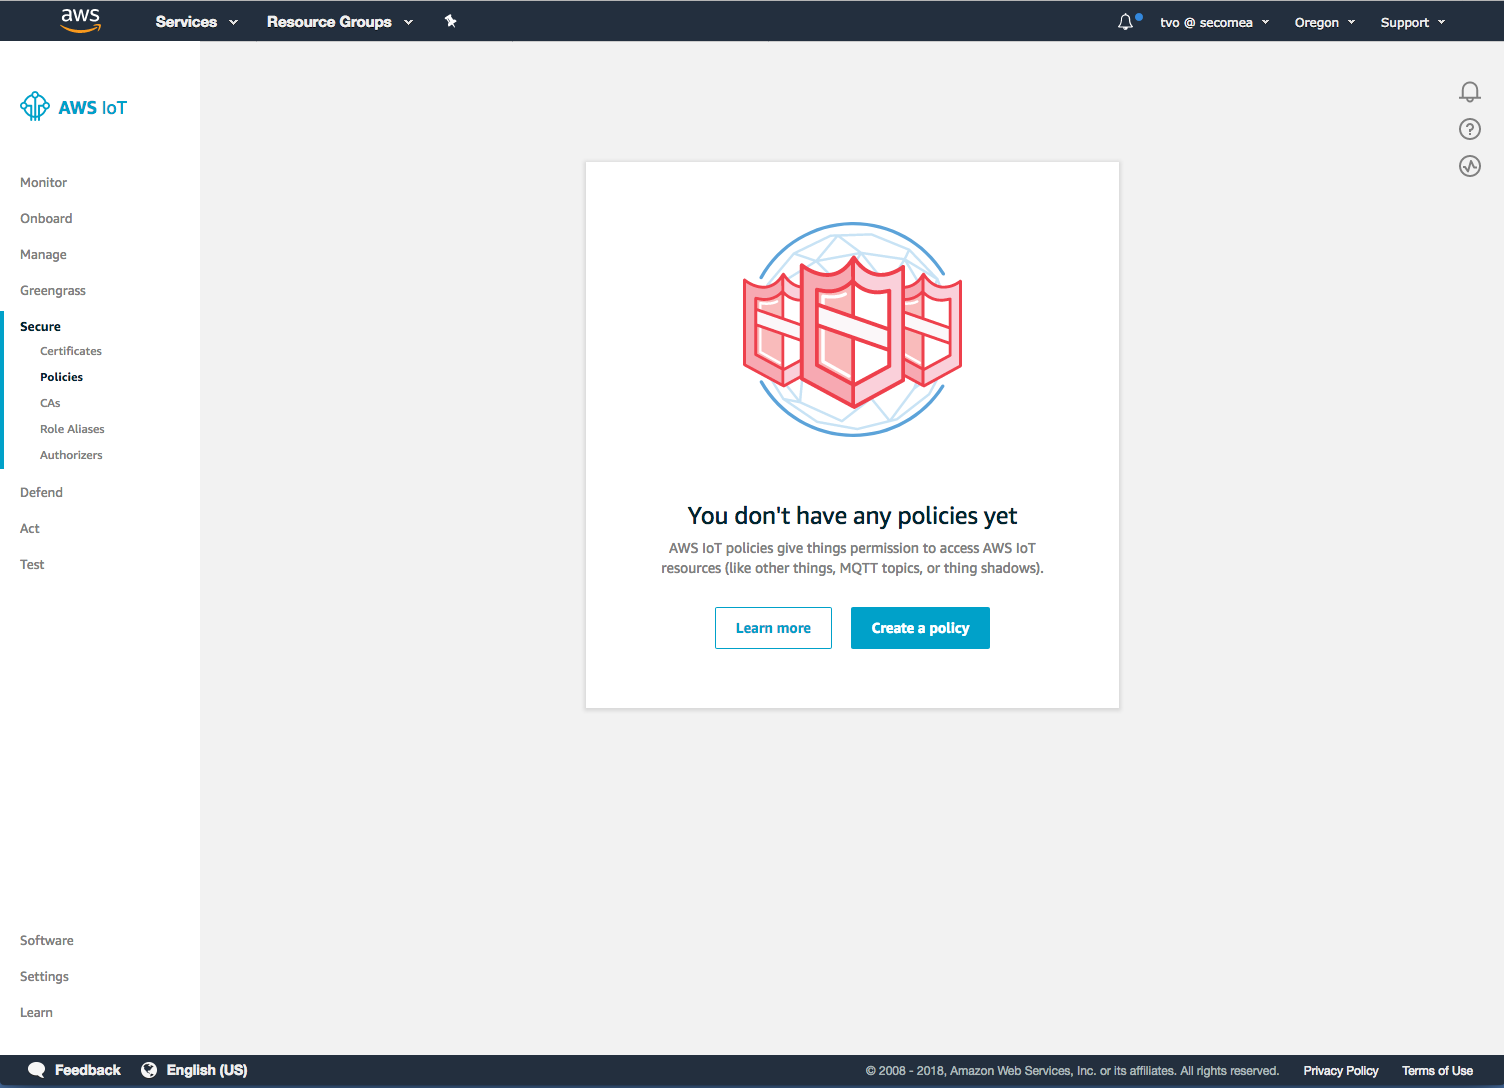
Click on Create a policy and give the policy a name (fx. IoTAllowAll)
Goto "advanced mode"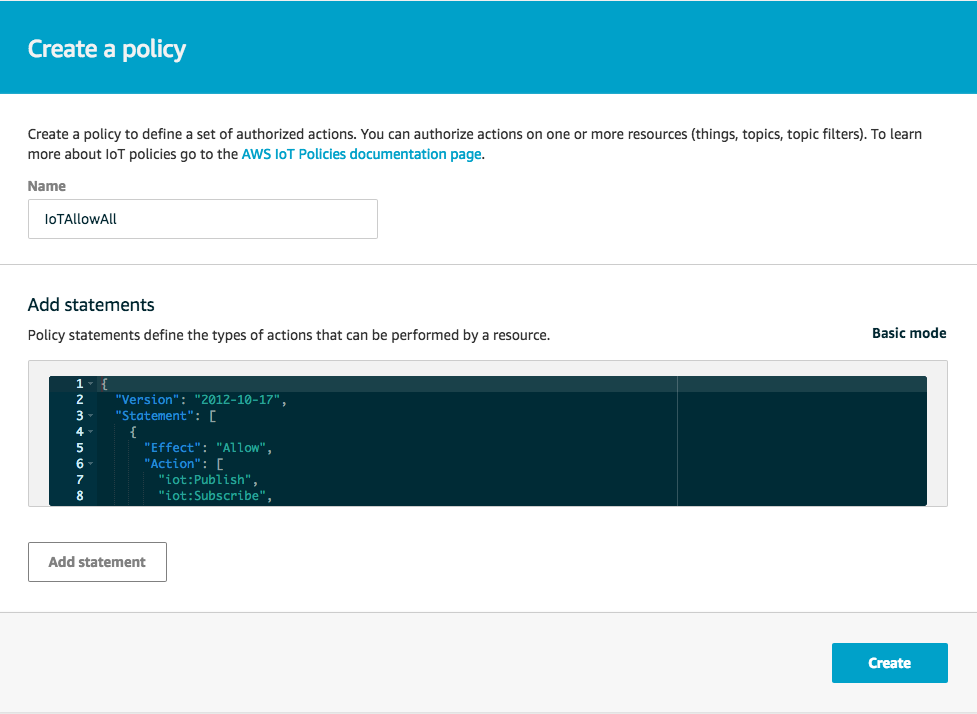
{
"Version": "2012-10-17",
"Statement": [
{
"Effect": "Allow",
"Action": [
"iot:Publish",
"iot:Subscribe",
"iot:Connect",
"iot:Receive"
],
"Resource": [
"*"
]
}
]
}
Click [Create]
Now the policy is available.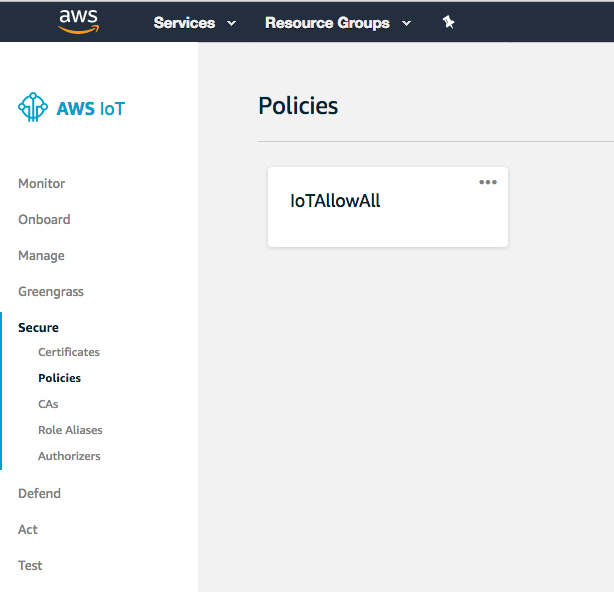
In the menu Click Manage (Things)
Click [Create a single thing] button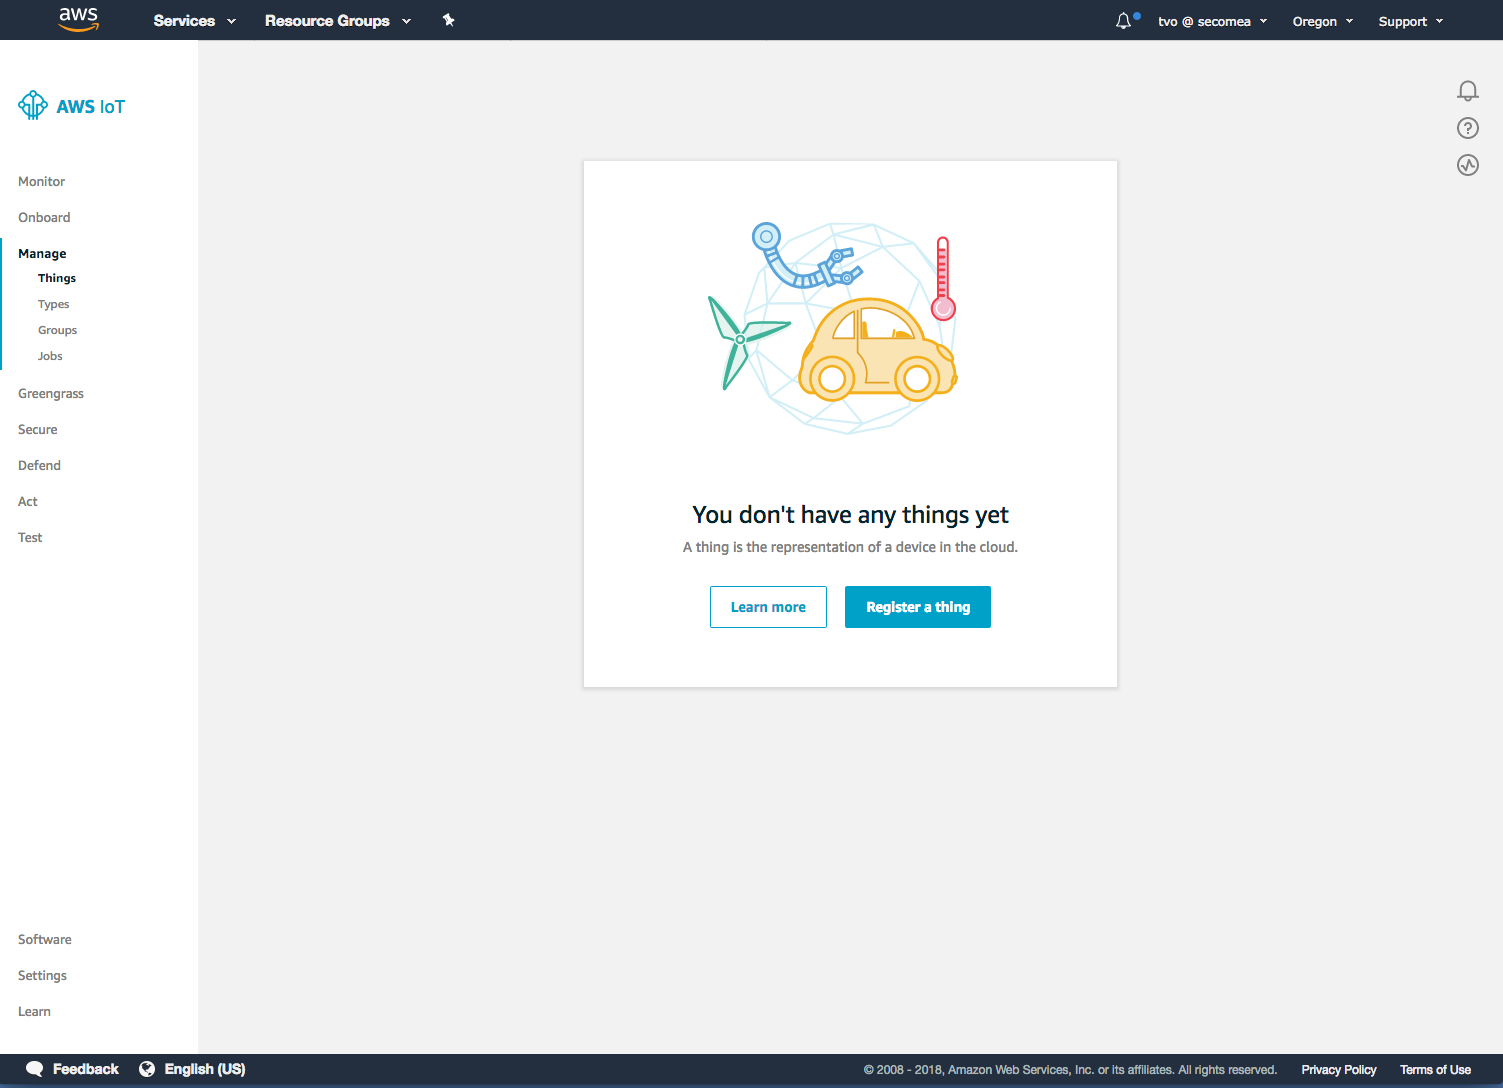
Fill in the Name and press [Next]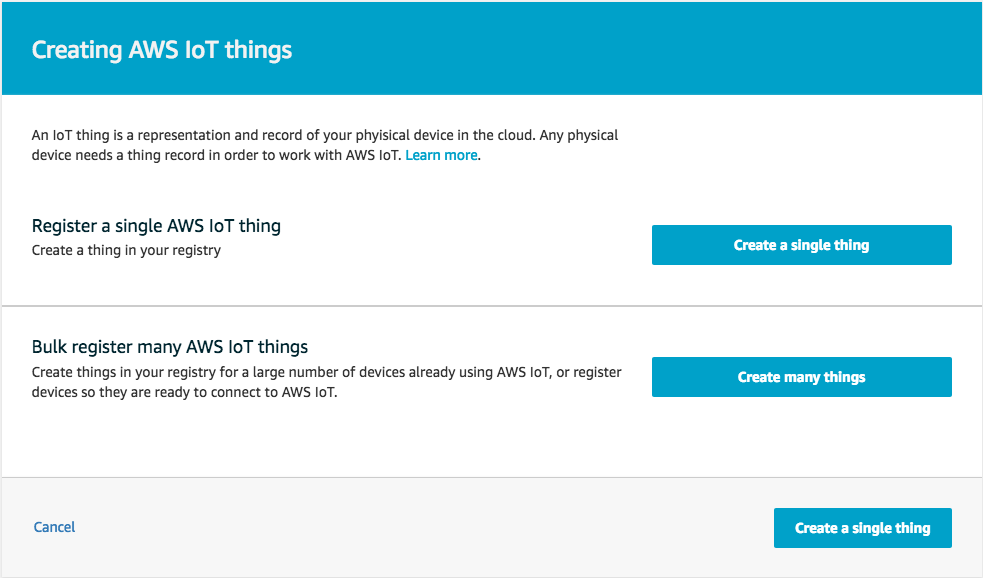
Choose [One-click certificate creation]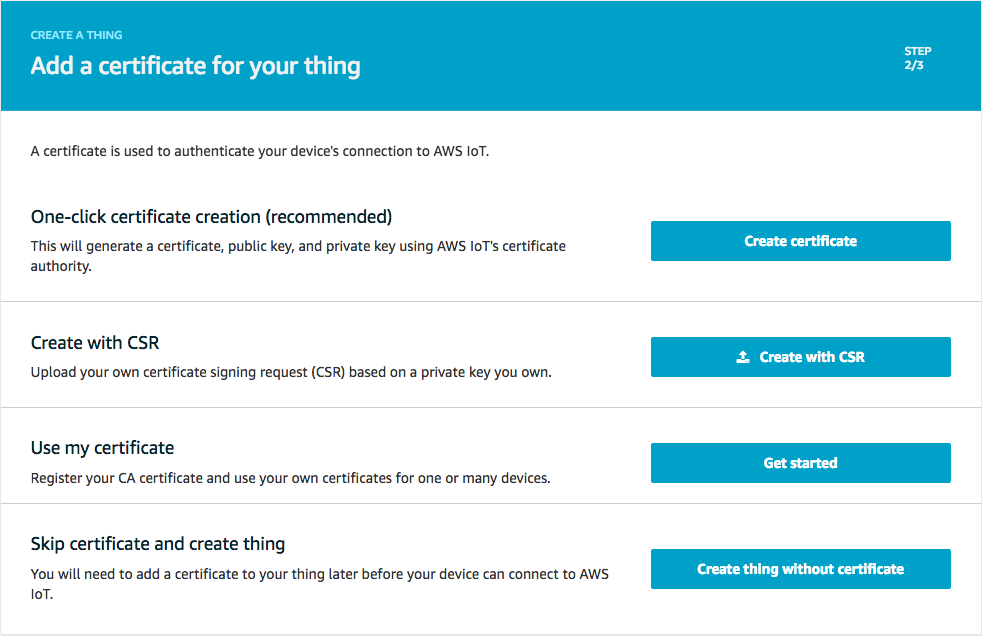
Now download the Thing (Device) certificate and the Private key files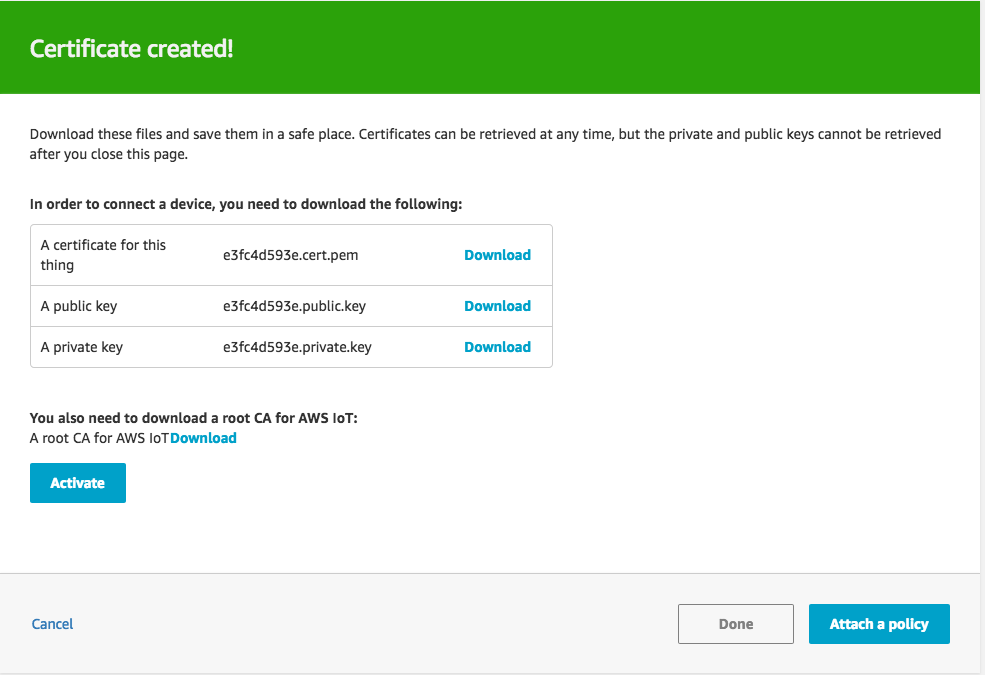
Press [Activate] to allow the SiteManager to use these certificates.
Click on the root CA download link (Opens a new tab)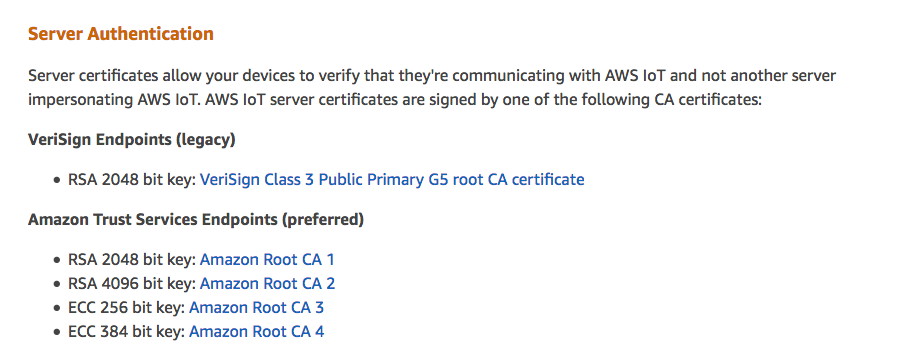
Right click "RSA 2048 bit key: Amazon Root CA 1" link and use "save link as" to download the ROOT-CA certificate to your PC.
Close the new tab.
Click [Attach a policy]
Select the policy you created before (IoTAllowAll)
Click [attach]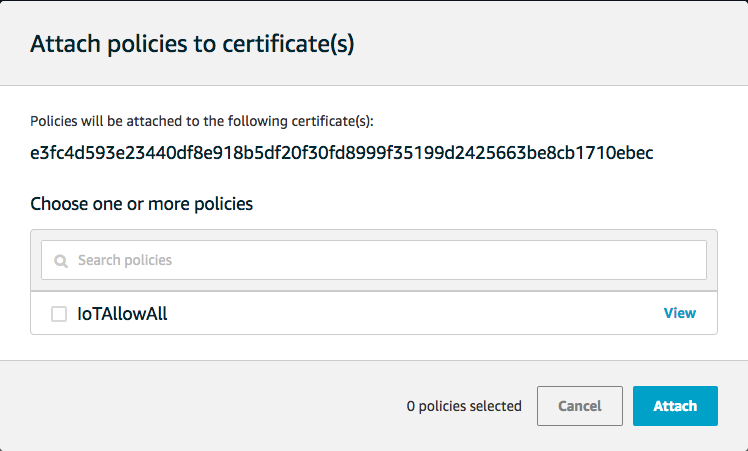
Press [Done].
Got the menu and Click Manage > Things
Select the Thing (SiteManager1_DCM)
Click Interact
Mark and copy the HTTPS link as shown below. This is you "BrokerAdr" which you need later.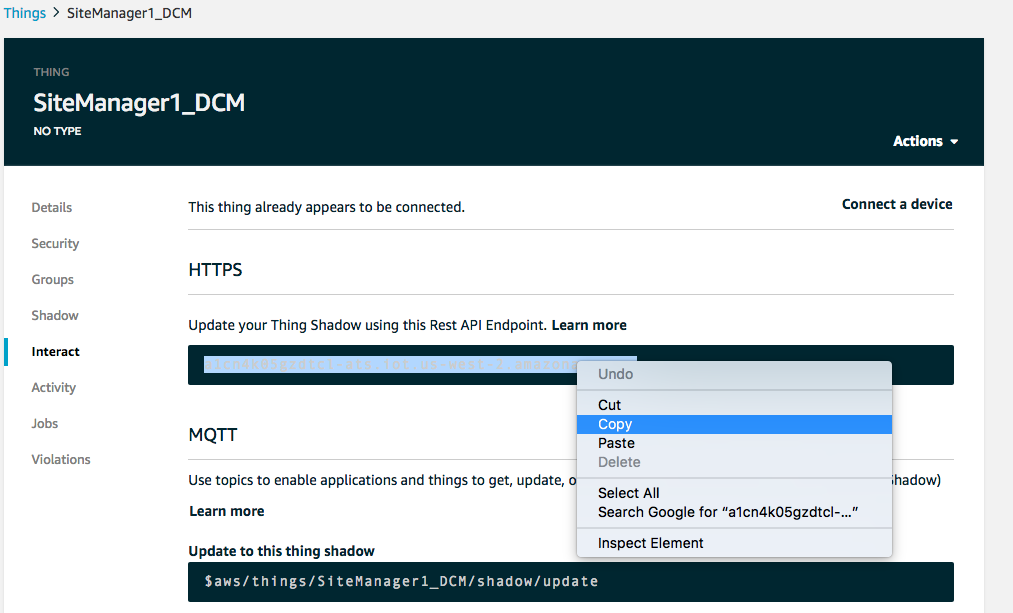
SiteManager config
Log into the SiteManager GUI > GateManager agents and click [New].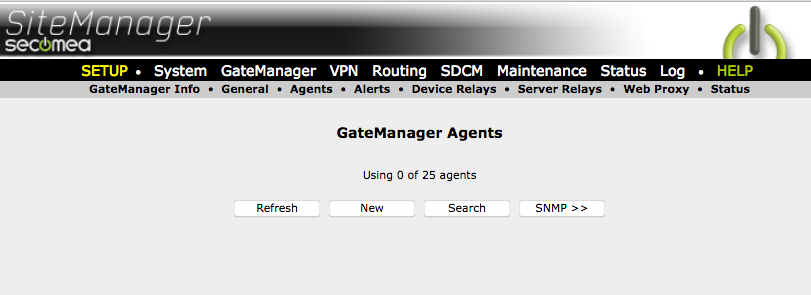
Select Generic / Data Collection Module Device
and give it a device name.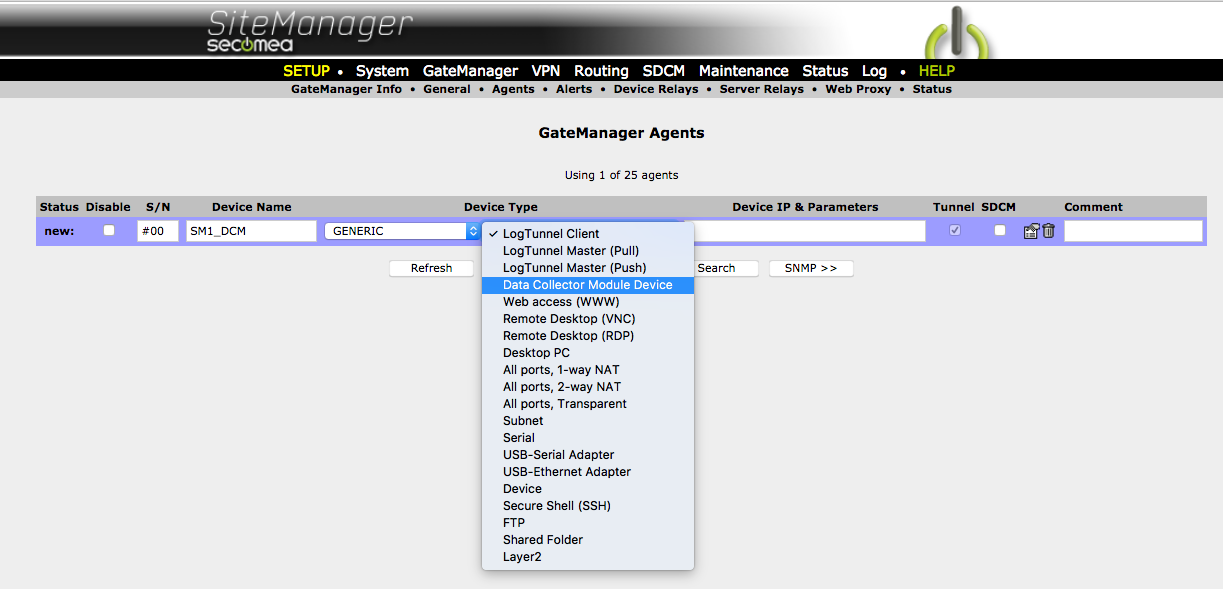
Goto parameter details view
enter Device Address: 127.0.0.1
DCM Collector Name: sim
Click [save]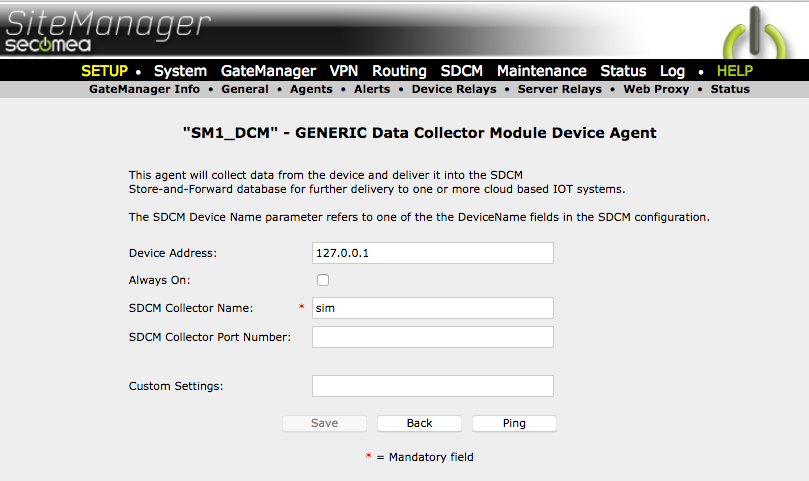
Goto DCM > Edit and copy paste the below file into the window (replacing what ever is there)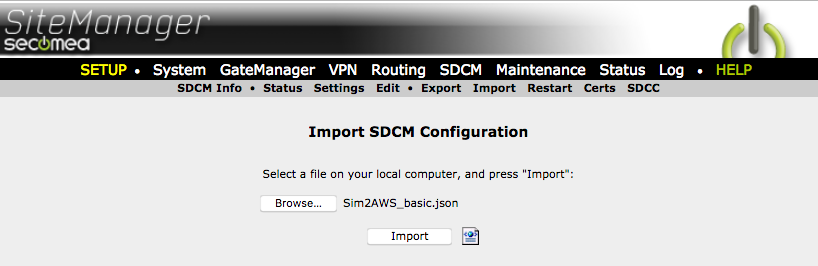
{
    "ConfigName":"AwsTest",
    "ConfigDescription":"Amazon AWS test configuration",
    "Collectors":[
        {
            "CollectorName":"sim",
            "CollectorDescription":"DCM Internal Simulation Server",
            "Protocol":"Simulator",
            "SamplePoints":[
                {
                    "SampleName":"sine",
                    "SampleDescription":"DCM simulation of sine curve",
                    "SamplesSaved":3,
                    "SampleDataType":"double",
                    "SimulatorData":{
                        "SimulatorFunction":"sine",
                        "SimulatorInitValue":1000,
                        "SimulatorIncValue":100,
                        "SimulatorSampleInterval":1
                    }
                }
            ]
        }
    ],
    "DataServers":[
        {
            "DatasrvName":"aws_iot",
            "DatasrvProtocol":"AWS\/MQTT",
            "ConnectRetryMin":2,
            "ConnectRetryMax":240,
            "MQTTAWSParams":{
                "BrokerAddr":"a1cn4k05gzdtcl.iot.us-east-2.amazonaws.com",
                "BrokerPort":8883,
                "RootCA":"awsrootca",
                "DeviceCert":"awsdevcert",
                "DevicePrivKey":"awsdevpkey",
                "PublishQos":"qos1",
                "PublishInterval":0,
                "TopicFormat":"iotgateway/%d",
                "PayloadFormat":"{ \"%js\" : %jv, \"timestamp\" : %t }"
            }
        }
    ]
}
Click edit and replace the current Brokeraddr link with the HTTPS link you copied earlier.
Click [save]
Go ito DCM->Certificates (Certs) and press [New].
Select type "AWS ROOT-CA", give it a name (fx. awsrootca) and choose the ROOT-CA file you just downloaded from Amazon.
Press [Save].
Press [New].
Select type "AWS Device Certificate", give it a name (fx. awsdevcert) and choose the Device certificate file you just downloaded from Amazon.
Press [Save].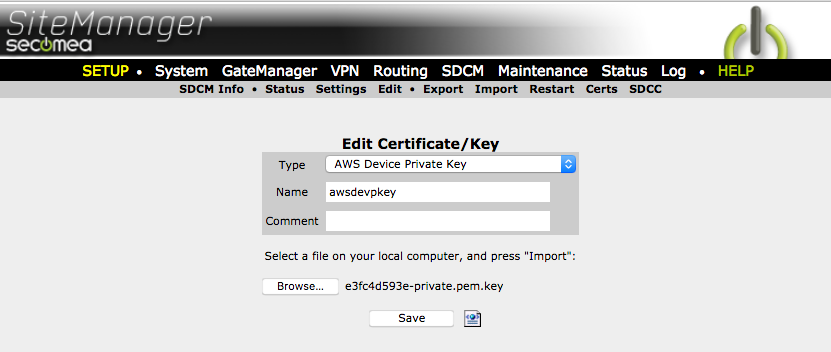
Press [New].
Select type "AWS Device Certificate", give it a name (fx. awsdevcert) and choose the Device certificate file you just downloaded from Amazon.
Press [Save].
Now you should have a set of certificates and keys like below.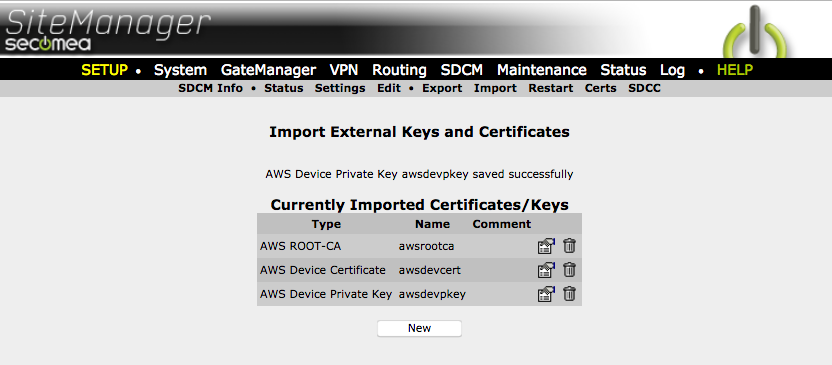
Goto DCM -> Restart and click restart.
Goto DCM -> Status -> Details - verify that the SiteManager is generating data and is sending to the cloud: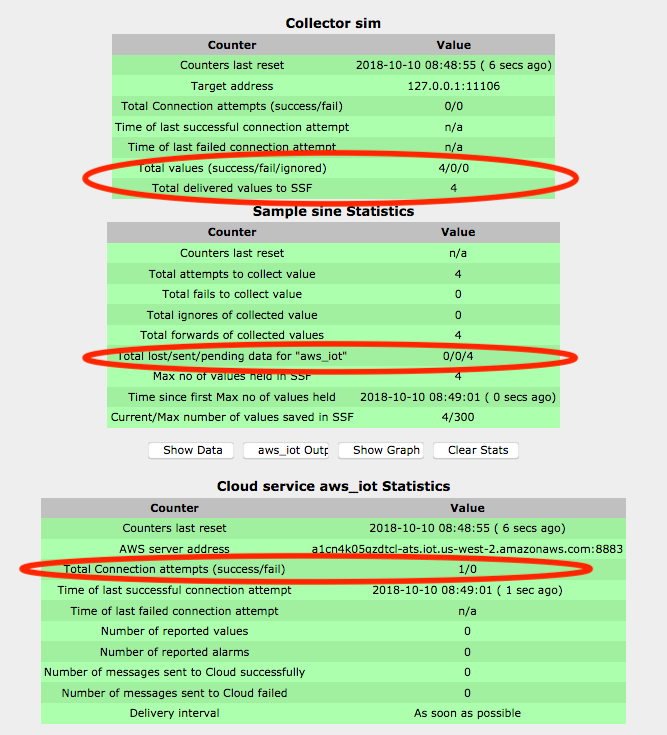
Login to you AWS management console > IoT Core
In menu select "Test"
Subscribe to topic "#" (All endpoints from all devices)
Select "Display payloads as strings"
Click [Subscribe to topic]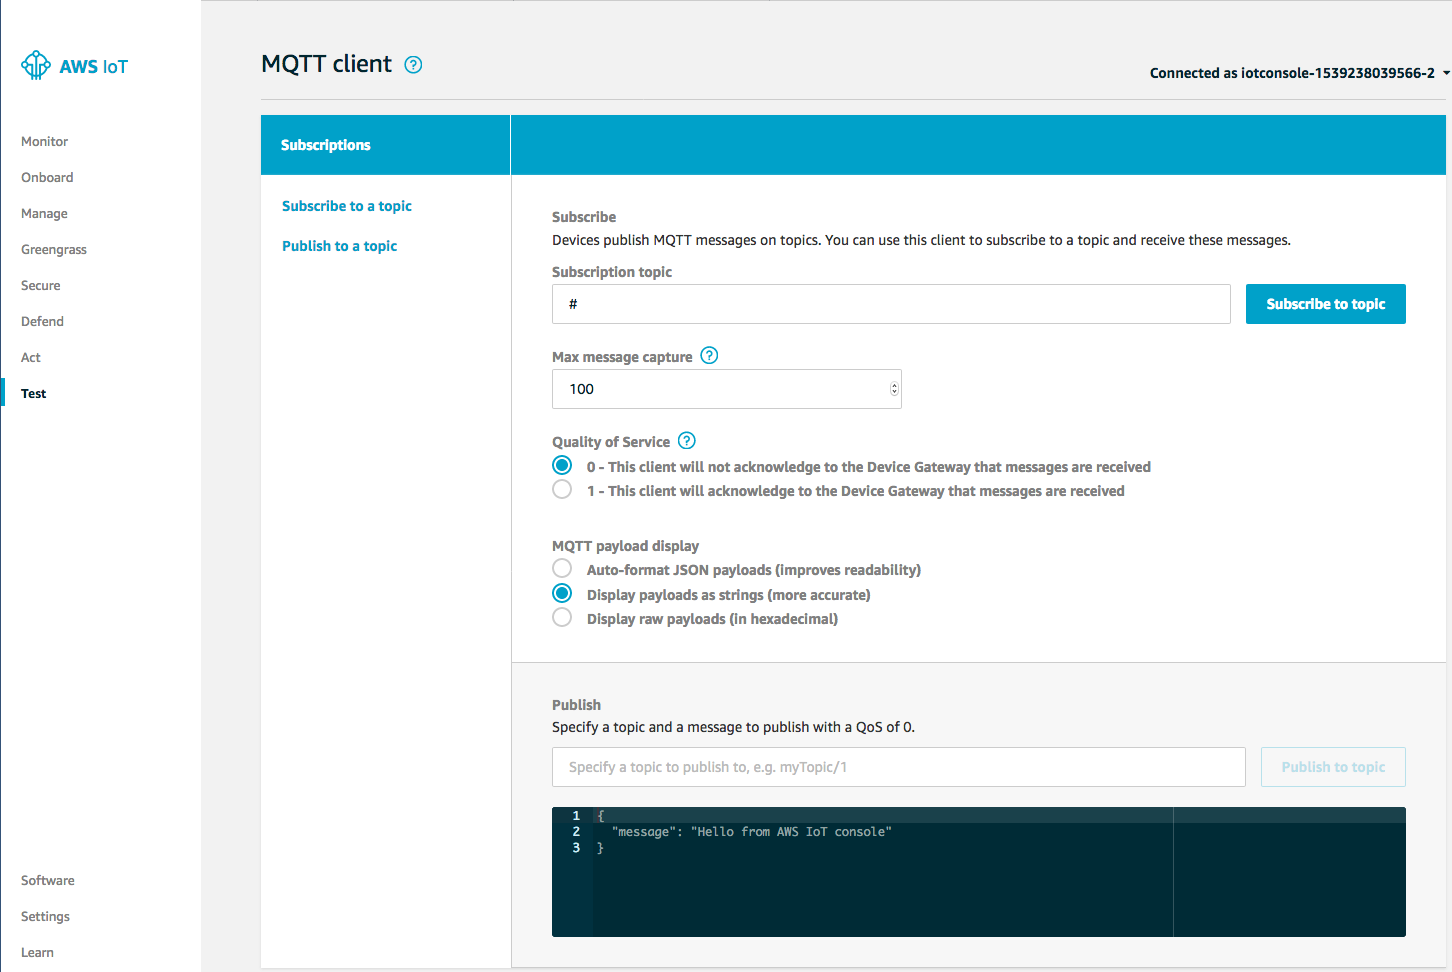
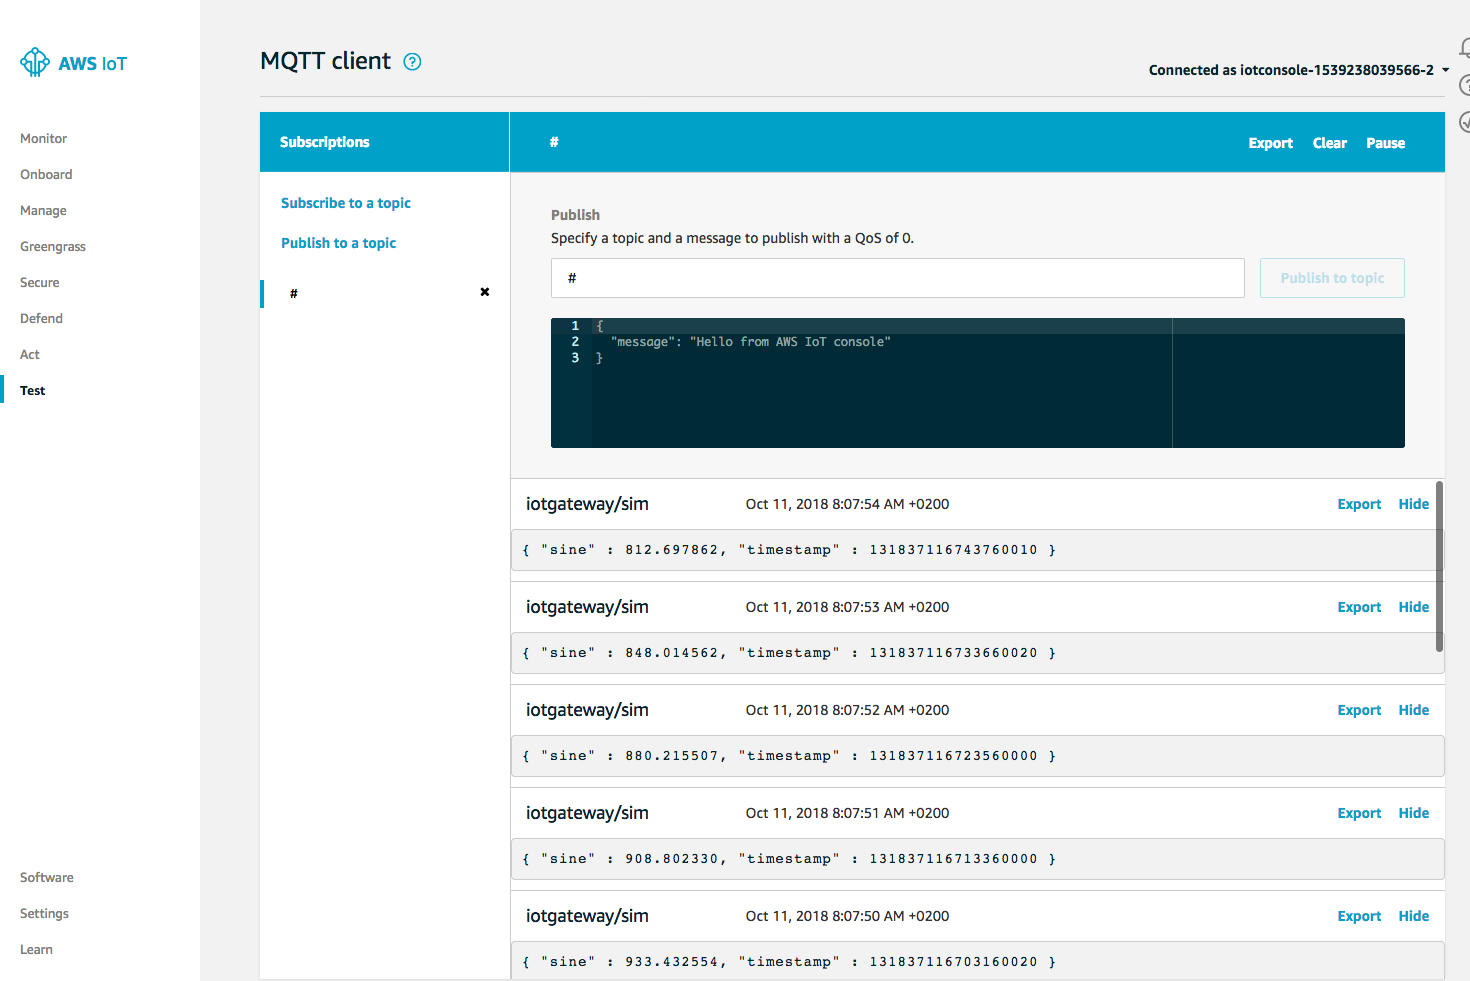
And now you should see the Sim data coming into the AWS IoT hub
Now it's time to learn more about the DCM config file and how to set it up for your devices:
JSON config file basic structure