This article will walk you through how to connect to a Siemens HMI or PLC using TIA and Step7 over Ethernet. You will be able to download our documentation that will go into detail about how to connect to a Siemens device using both Ethernet, USB, and Serial.
TIA Connecting to your device
Connect to the agent created for your device.

Start TIA.
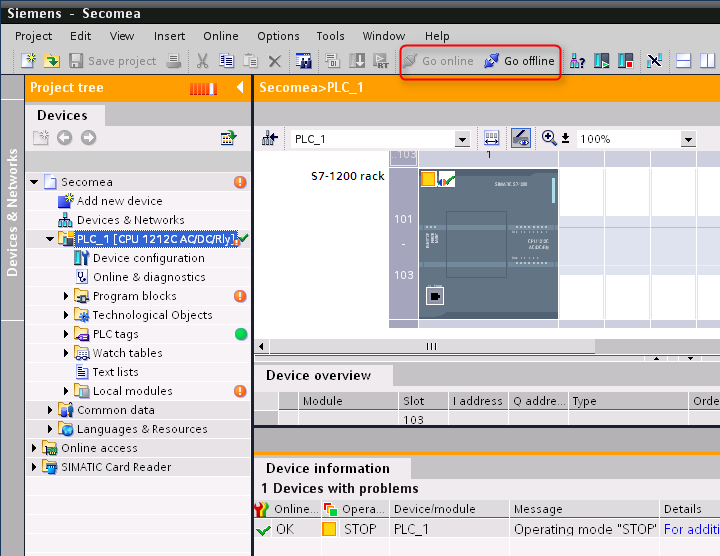
Go to Online > "Go online" or "download to device".
Click "load" or "go online" to connect to your device.
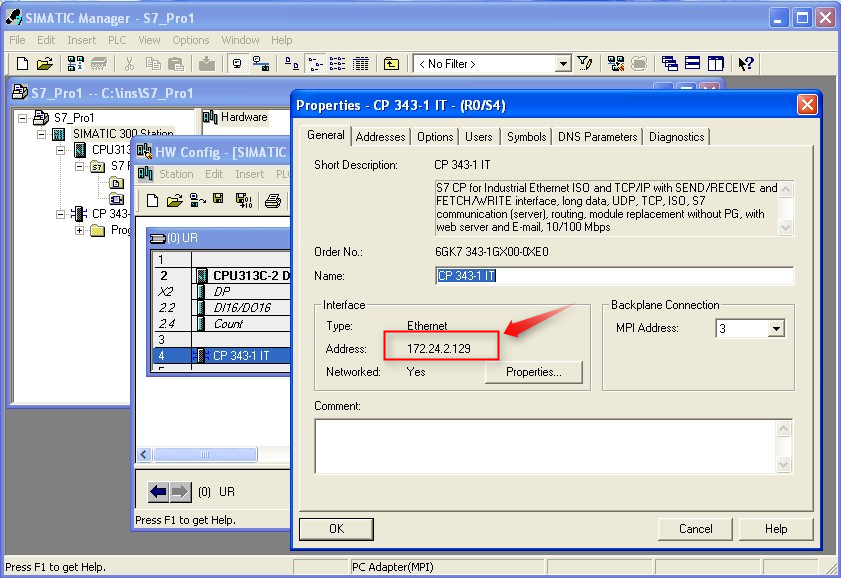
Ensure that your project is configured with the IP address that the LinkManager is connected to, by selecting the PLC
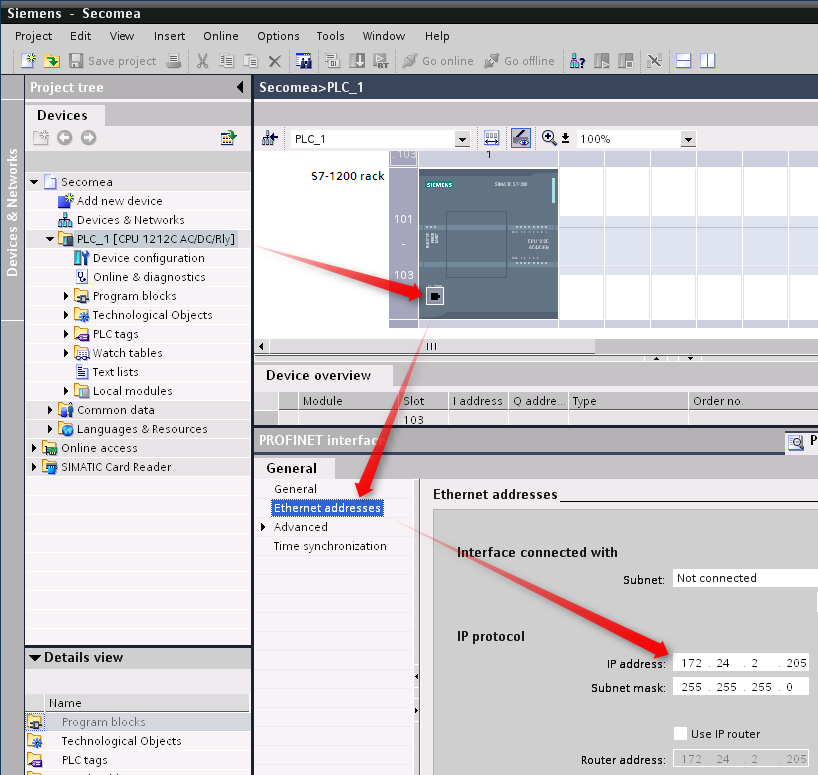
If matching the LinkManager, you can go online on the PC.
Tips and tricks
- If "Go online" or "download to device" fails
- Go to "Extended Go online" or "Extended download to device" instead.
- Make sure that "Show all compatible devices" is disabled
- Search for your device. (It will only be able to show the IP address of the device.)
- Continue from step 4 in the "Connecting to your device"
- You can send and receive SMS via a SiteManager by using TCP commands. We have a project file that can be downloaded and modified to work on other setups available in the download section. The file has been created in TIA 12, where an S7 1200 PLC is set to send TCP commands to a SiteManager. The TCP packet triggers the SiteManager to send an SMS. ATTENTION: This is not a file that we have created, and does not offer support on how to configure or use it.
HMI
- The HMI's that we know which requires "Support KTP HMI Panel" enabled in the agent are TP 277-6, KTP1000, KTP1200,
- This feature can be enabled in the "Parameter Detail" page on the agent.
- Go online will not work with HMI, Use "Extended Download to device" instead.
- TP700 and TP800 HMI's do not always support PN/IE mode. This may need to be changed to Ethernet, please see section 3.1 of "Connecting to your device."
- WinCC is not compatible with earlier versions than Internet Explorer 11. If you use this, then you might need to use "Compatibility View Settings".
- If you cannot see the device when clicking Download to device you will need to remove the checkmark in "show all compatible devices".
STEP7
Connecting to your device
Connect to the agent created for your device.
Start Step 7.
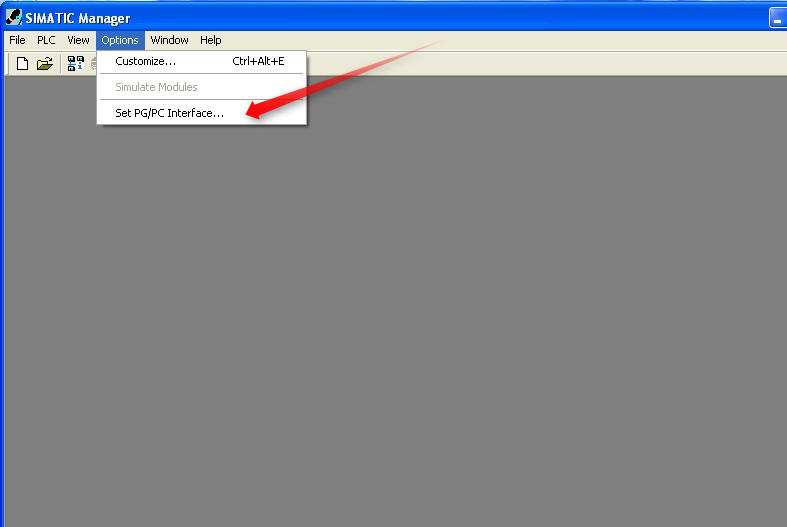
Click "Options > Set PG/PC Interface".
Choose "Virtual TAP adapter".
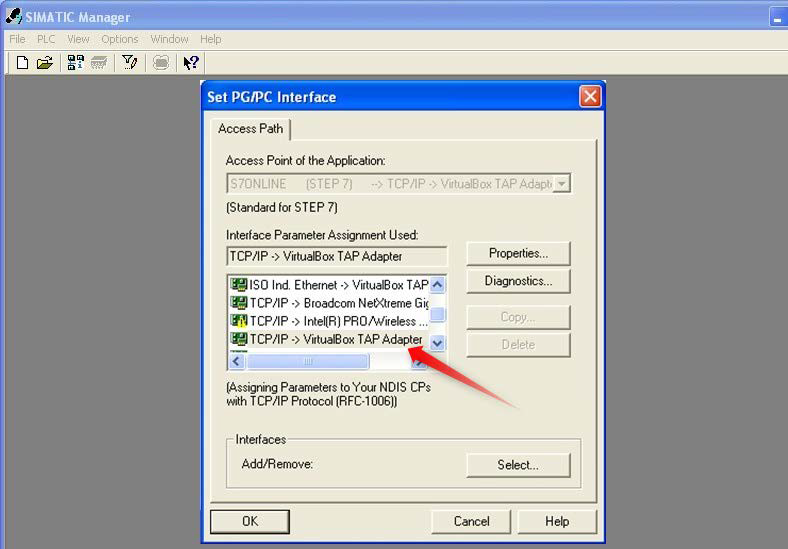
Click OK.
Open your project.
Go to "PLC > Establish Connection to Configured CPU".
In the project select PLC Establish Connection to Configured CPU. You should see the green RUN indication at the bottom.

Please note, that you will only be able to connect to a device with a pre-defined IP address. If your device doesn't have an IP address, you should use our Layer2 solution.
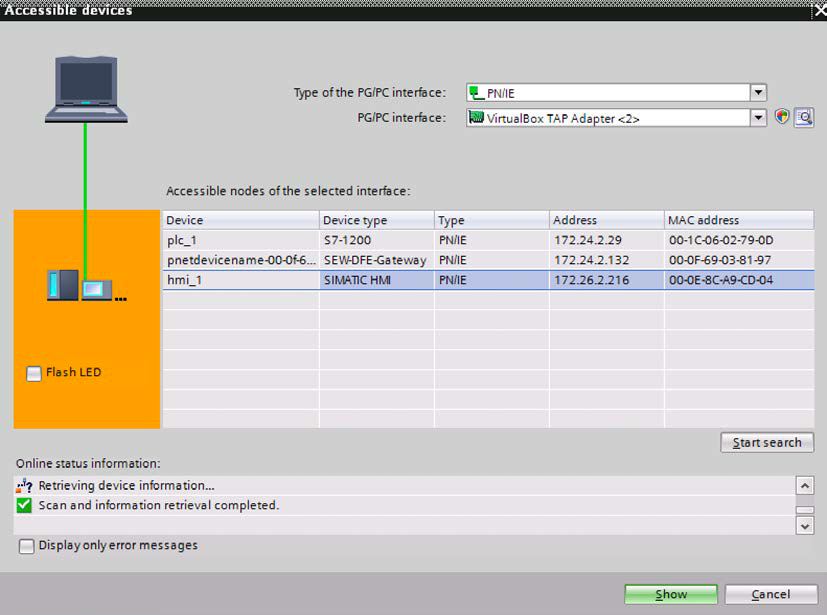
With the Layer2 agent you will now experience that the TIA portal can scan and detect all Siemens devices in the DEV network of the SiteManager:
How to use Layer 2 agent
- Connect to your Layer 2 agent in LinkManager.
- Go to Start and type “ncpa.cpl” then hit enter.
- Right-click the LinkManager L2 Adapter and click “Properties”
- Click on “Internet Protocol Version 4 (TCP/IPv4)” and click “Properties”
- Type a free IP address on the remote network in IP address. (This will be your address on the remote network)
- Type in the Subnet mask for the remote network. (Most of the time this will be 255.255.255.0)
- Click “OK” then “Close”
- Now you are ready to connect to your devices.
For more details see the Application Note below