This article will cover the new feature "In-Browser VNC viewer" released with the Secomea release 7.2.
The In-Browser feature in GateManager is based on the noVNC Open Source framework. Although a big effort has been made to support many VNC features and browser types, you may still encounter limitations compared to dedicated VNC client applications. In case of issues, we recommend using a suitable VNC client application. Particularly the free clients TightVNC RealVNC and UltraVNC are recommended and the GateManager has support for automatically detecting and starting these clients in combination with LinkManager
The connection will take place through an encrypted session and there are no external dependencies.
Supported browsers.
- Google Chrome
- Internet Explorer*
- Microsoft Edge*
- Mozilla FireFox
- Opera**
- Safari**
*On some Windows and browser versions it's be experienced that the mouse isn't displayed during operation when using the In-browser option.
**The VNC server type should not make a big difference, testing was done on major VNC servers (UltraVNC, TightVNC, etc.) including native versions for panels with Windows CE - like the EfonVNC, which is widely used on brand name panels.
Known issues
Please note the following.
- A self-signed web certificate is not allowed. If detected, the In-Browser VNC option will be either be disabled or not selectable.(GateManager OWN)
- Opera will not have full functionality on iOS, Android and Linux.
- Konqueror is not supported.
- Safari will not function in private mode, as the LocalStorage is then set to 0 (this might hold true for other browsers).
- Mozilla FireFox on Android could in some instances display a hand icon instead of the configuration icon, but the placement and functionality is working.
- Please not that In-Browser VNC will not connect if the “User name:” field is used.
- Locking the mobile device will disable the connection to the target.
- Encryption "On" can be the reason the the VNC will not work properly.
Configuring the agent
STEP 1:
- Setting up an In-Browser VNC agent is no different from an external agent. Just create any VNC capable agent, like the “Remote Destop (VNC)” agent:

- Clicking properties will give you additional options:
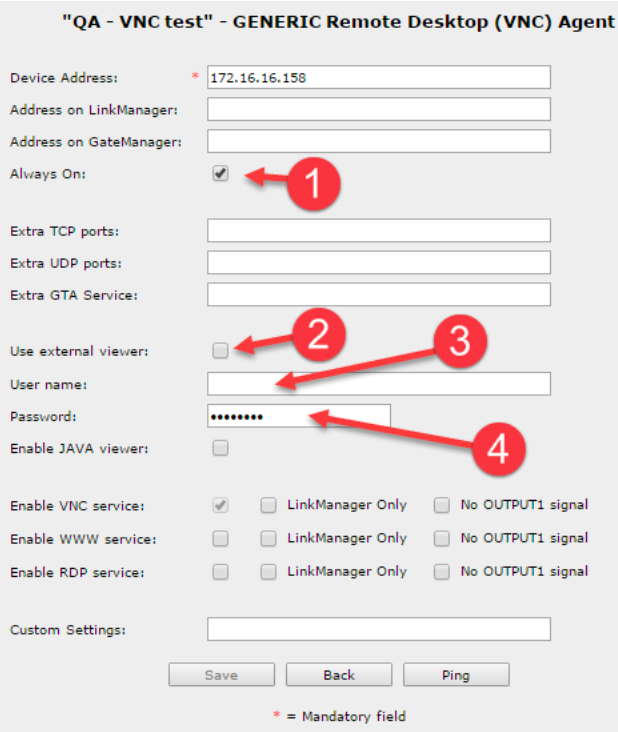
- Selecting “Always On:” is necessary on most Windows 7 and 10 installations when using the VNC viewer to access a workstation screen. This is due to the internal firewall, that prohibits IMCP pings from coming through. The Agent uses ICMP ping to check if the agent target is up. Either configure the firewall to let the ICMP ping though, or just assume the unit is up by selecting “Always On:”.
- In-Browser VNC viewer already enabled when upgrading to 7.2. An external VNC viewer can always be selected over the internal viewer when using either GTA from GateManager or LinkManager mobile.
This can be set globally from the agent directly by selecting “Use external viewer:”.
Use cases for this option, could be special native VNC servers that require tailored clients or APPs that was created to handle the VNC client. - As stated above, please do not use the “User name:” with the In- Browser VNC viewer. This option was meant to pass information to the LinkManager service. Not to LinkManager Mobile.
- Setting a password will enable the In-Browser VNC viewer to pass it to the server and do a login without credentials.
Selecting internal or external viewer
STEP 2:
When using LinkManager mobile, just select the VNC service like in previous versions prior to 7.2: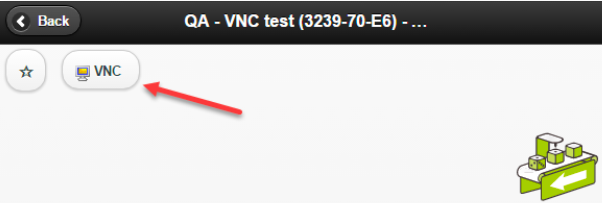
Then click "START" to get access to the VNC server through the In-Browser VNC viewer.
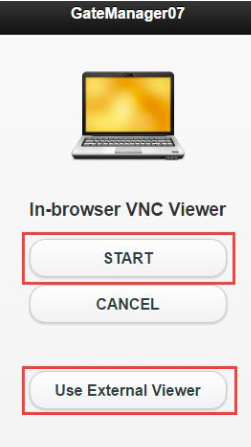
Note that this screen has a 30 second time-out, and “START” should be se- lected within the 30 second timeframe. Otherwise the VNC client cannot connect:
The same is true for selecting “Use External Viewer” and starting the external program.
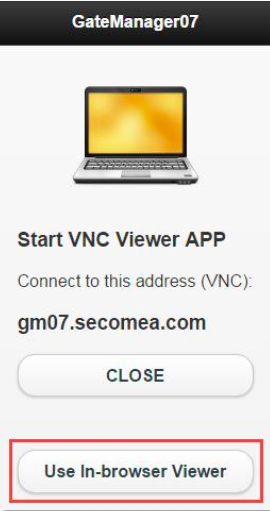
If the External viewer is selected, it can be changed back to the Internal Viewer here:

Using the In-Browser viewer
STEP 3:
When connected to the VNC server using the In-Browser VNC viewer, there will be an option tab to the left of the screen.
Clicking this tab will roll out the options menu.

The options menu (rotated for readability) can have a different number of icons depending on platform and use. The one depicted here is from FireFox on iOS.
- Hand Icon: This icon appears when the VNC target screen is larger than the host screen, typically on mobile devices.
Clicking this icon will turn the pointer into a hand icon and let you move the target screen around. - Mouse Icon: Clicking icon this will toggle between left, right and mid- dle mouse button. The icons start with the left button (marked blue).
This icon appears on mobile devices and is used to emulate a mouse click from the desired mouse button. - Keyboard icon: When the host system does not have a keyboard (Normally on mobile devices), pressing this button will bring up the virtual keyboard on the device.
- Key icon: To send special keyboard combinations, this icon can be used. The picture below (rotated for readability) lets the user select between (from left to right):
- Ctrl key (Control)
- Alt key (Alternate)
- Tab key (Tabulator)
- Esc Key (Escape)
- Ctrl-Alt-Del key sequence

- Clipboard icon: With this icon, text can be pasted from the host to the target system. See example below
When text is entered, it will be available for the local OS on system that supports it. Clicking “Clear” will erase the clipboard data.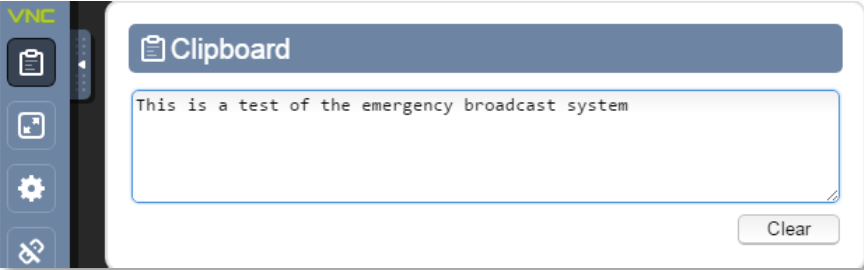
- Fullscreen icon: Pressing this button will display the VNC target screen without borders or other headers. This icon is present on Android but not all operating systems, iOS will not have this ability.
Please note that this button has nothing to do with image scaling. - Settings icon: Pressing this button will bring up the settings menu (see picture below).
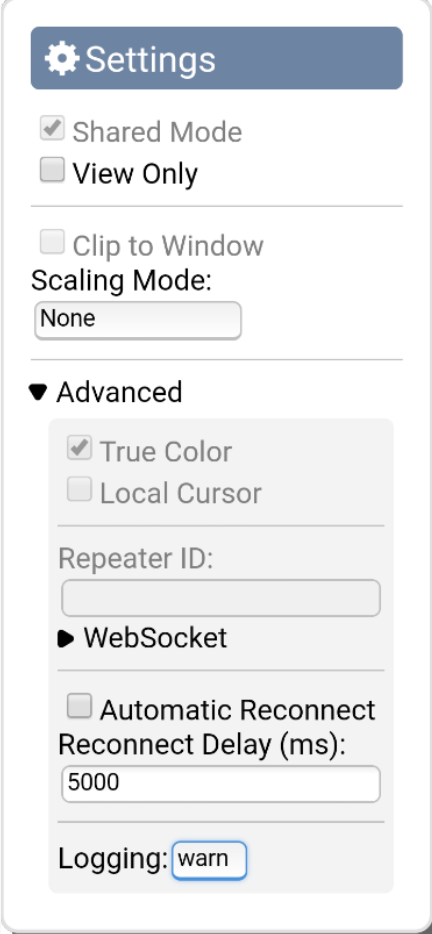
Some of these settings are selected by default and cannot be changed. This includes the "WebSocket" and the "Shared Mode" settings. Other settings might be unavailable depending on context and host platform.
View Only: This setting is self-explanatory; it locks the target so no changes can be made. This option persists through browser sessions and devices on the same GateManager.
Scaling Mode: There are 4 options, "None", “Local Scaling”, "Local Downscaling" and "Re- mote Resizing".
"None" will display the target precisely the size as the original, leaving the image either too big or too small, the hand icon can be used to mode the image around.
"Local Scaling" will do both upscaling and down-scaling, while "Local Downscaling" only allows downscaling.
"Remote Resizing" will request the target to resize the target screen to match that of the VNC viewers host screen.
Logging: can be switched between "Error", "Warn", "Info" and "Debug". This setting will control the logging to the Java Script Console.
Automatic reconnect should not be configured as it has no effect in this scenario.
- Exit icon: Pressing this icon will terminate the current selection and return to the Appliance view.
This is how it looks (Video)
Troubleshooting
STEP 4.
- Internal VNC browser viewer does not connect to VNC server
- Try disabling "encryption" on the VNC server side