This article provides information on how to set up SiteManager Embedded to enable it to connect to a GateManager.
SiteManager Embedded (SM-E) is the software that you place in your remote location where you want to gain access to a device.
It is easy to set up, easy to use and easy to configure both remotely and locally.
Machine with SiteManager Installed - For information on how to install SiteManager embedded, see the following articles:
- Installing SiteManager Embedded on Windows Step by Step Tutorial.
- Installing SiteManager Embedded on Ubuntu Step by Step Tutorial.
Access to the PC where the SiteManager Embedded is installed.
Step-by-step guide:
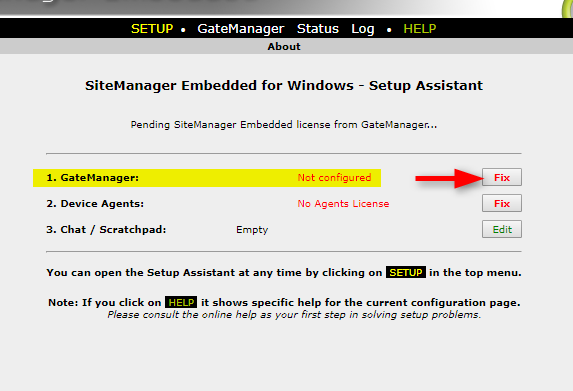
- You will need to be at the start page of the website embedded. If it is not already open you can open it by finding the “SiteManager Embedded” application on your PC and clicking it.
- On the site find and click the “Fix” button as seen below next to the arrow.
- You now need to enter the GateManager Address (1) and Domain Token (2).
You can also change the Appliance Name (3) to something more fitting for your setup.
See the picture below for the numbers of where to input the information.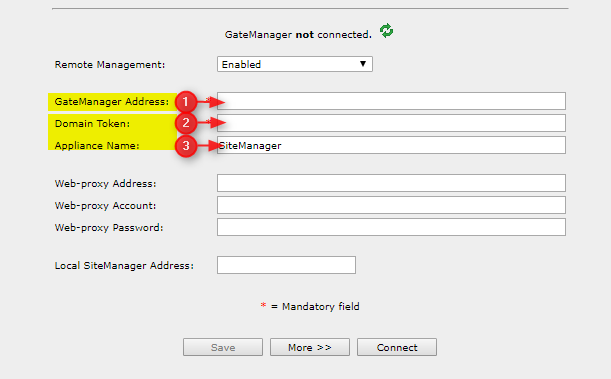
- Press the “Save” button.
- If the GateManager address and Domain Token are correct, it should look like the picture below.
If you do not have the “Not Attached!” message – please verify that your “GateManager Address” and “Domain Token” information are correct, for more information on the port requirements see this article.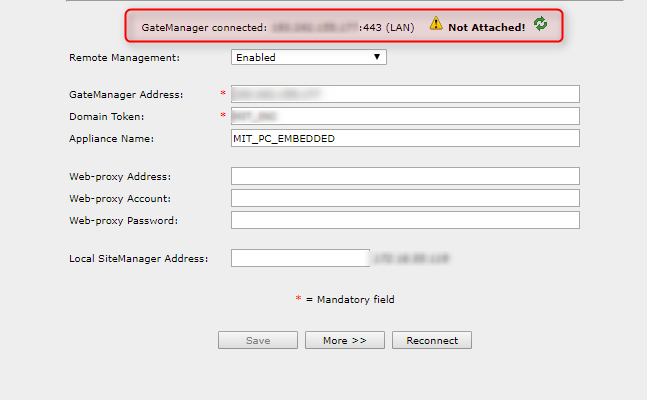
- Now log in to the correct GateManager with a user who has access to the “GateManager Domain” for which you set up the SiteManager Embedded connection.
- Once logged in select the new SiteManager Embedded – it will have the name you gave it in “Appliance name” in step 3 – see the picture below for reference of what it looks like.

- On the right side of the GateManager after selecting the correct SiteManager Embedded you will need to select a licence type in the “Select License Type” dropdown field – see the picture below. If you do not have a licence, please order this via your point of purchase
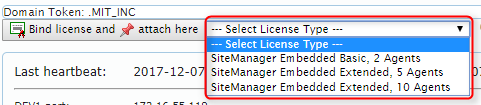
- Once you have selected the correct licence type - click “Bind license and attach here”.

- The licence is now attached to the SiteManager Embedded and should similar to the picture below.

- Click the “SiteManager GUI” button to go to the SiteManager Embedded configuration site.
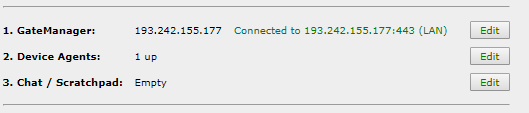
- Your setup page should now look like the picture below. If everything is green your SiteManager is now correctly set up and ready to use.
Note: By default, there will be an agent created that opens for RDP or VNC access via LinkManager. This means you can immediately connect via RDP or VNC to the windows machine via the LinkManager Application.